كيف تصنع انسان الي بدون دارات الكترونية الروبوت الخنفساء بالصور و الفيديو how to make robot

Beetle bot هو روبوت بسيط جدا يتجنب العقبات على الارض من دون استخدام أي رقاقة من السيليكون -- ولا حتى مكبر عمليات، وبالتأكيدلا يحتاج الي برمجة أي شيء. هناك اثنين من المحركات تدفع الروبوت إلى الأمام ، وعندما تبلغ واحدة من قرون الاستشعارعقبة فان الروبت يعكس الموتور المقابل ليلف حولها ويتجنبها ، ويستخدم المشروع فقط2 من المفاتيح 2 من والمحركات ، و 1 حامل بطارية ، ويكلف أقل من 10 دولارات في المواد (أو مجانا ، مع بعض الاستعارة).
The following article will show you how to build a simple robot,
called “The Beetle Robot”, created by Jerome Demers. It’s great for beginners and easy to do.
This is the Beetle Robot v. 3 you are going to build:
called “The Beetle Robot”, created by Jerome Demers. It’s great for beginners and easy to do.
This is the Beetle Robot v. 3 you are going to build:

Before starting, I suggest you to read the complete tutorials. This will greatly lower the chances of you making a mistake.
Tools Needed:
* soldering iron
* electronic solder
* diagonal cutter
* Mini glue gun
Components for the robot
* 2x – small 1.5 Volts motors
* 2x – small paperclips
* 2x – big paperclips
* 2x – batteries AAA or AA
* 1x – battery holder AAA or AA
* 1x – 2 cm of heat shrink
* 1x – wooden pearl (for the caster)
* 1x – meter of electric wire
* 2x – Sub-mini lever SPDT switches

Here are the serial numbers of the components and tools from RadioShack .
Component Number
soldering iron 64-2184
electronic solder 64-006
diagonal cutter 64-2951
1.5 Volts motor 273-223
battery holder 270-398
SPDT switch 275-016
Most of the components can be bought for much cheaper at Digi-Key, Jameco, or similar.
At Solarbotics you can find the dual AA battery holder and the Mabuchi motor. You can find these components at any good electronic store.
Here is all the parts for the construction the beetle robot.

1. Cut the electric wire in pieces of 6 cm each, 13 times.
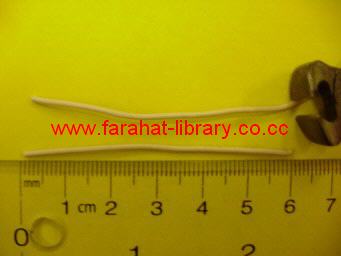
Strip 1 cm at each end.


4. Take the battery holder and make a connection to the connection.

This will give a third connection.See picture below.

The blue wire is the third connections

5. Turn the battery holder up side down so the batteries point to the ground. Glue the two switches on the battery holder in a V form.


You can make a nice looking caster or a normal one


8. How to make the connection


9. Take the small paper clip and bend them to make antenna.

Glue them to the switches and don’t put to much glue.

Add 1 cm of heat shrink to the shaft of each motor.


وهذة بعض مقاطع الفيديو لمشاهدة الروبوت
This is some movies for the robot in action
الروبوت الخنفساء 1
الروبوت الخنفساء 2
الروبوت الخنفساء 3


شباب وش الجهازين الي حاطهم حساسات ووين احصلهم
ردحذف